Project oops
A few days back I wrote a post about fancying up a plain Nightstand to make it unique. Well, the end product turned out just fine but it took me a couple of attempts and one big fail to get there. I originally wanted to paint it a color, something like this :

But decided against it after the white bed frame that I wanted wasn't in stock and had to get a black one instead. I just didn't want to have a black bed frame, white dresser and teal nightstand, it would look too crazy I think. So I decided to paint the nightstand white and then fancy it up. I thought grass cloth wallpaper would look cool but didn't want to spend so much to purchase an entire roll since I just needed a small amount. Then I decided to do nailhead trim. I love me some nailhead trim and had seen lots of DIY'd nailhead trim furniture.


But to save time, I read you can use a long strip of fake nailhead trim rather than hammering in each individual nail. Basically, it is a strip of fake nail head looking metal and every 5 or so is a hole that you would hammer in an actual nail.

Seemed easy enough. So I ordered it on amazon, got it a few days later and busted it out, applying it to the front of my drawer that I had already covered with paintable wallpaper and then painted. I wanted the nailhead trim to act as a frame or border around the wallpaper. After the first strip was applied I knew it wasn't going to look good but finished the entire border anyway. It looked awful. I didn't even take a picture of it, but the fake nailheads looked super cheap especially compared to the real nailheads. Also, the trim wouldn't stay in a straight line, and the real nails were impossible to hammer in all the way flush with the wood, so every 5 spaces there was an awkward looking real nail sticking up higher than the trim. Bad, just bad. I'm sure it works, as I've seen people's finished products online, and I'm sure it's easier to use on something that is upholstered. Or maybe it works if you have the patience to be meticulous. But I didn't because my little mister was screaming in the background. Anyway, after a few days of disgust, I decided to rip it off, repaint the front of the drawer and buy some wood moulding trim to frame out the drawer. I picked some that was thin enough so that it didn't overpower the drawer but thick enough to cover up the nail holes and scratches from the nailhead trim. So I cut the wood trim, glued it on (had an issue with that, too, you can read from my previous post...still need to caulk it), and repainted and all was (almost) well. So, there you have it. Hopefully I can spare you the trauma of using pre fab nailhead trim. But, something to take away from this is that you can try something and if it looks hideous or doesn't work, you can usually fix it and make it work. Yay for learning through mistakes.
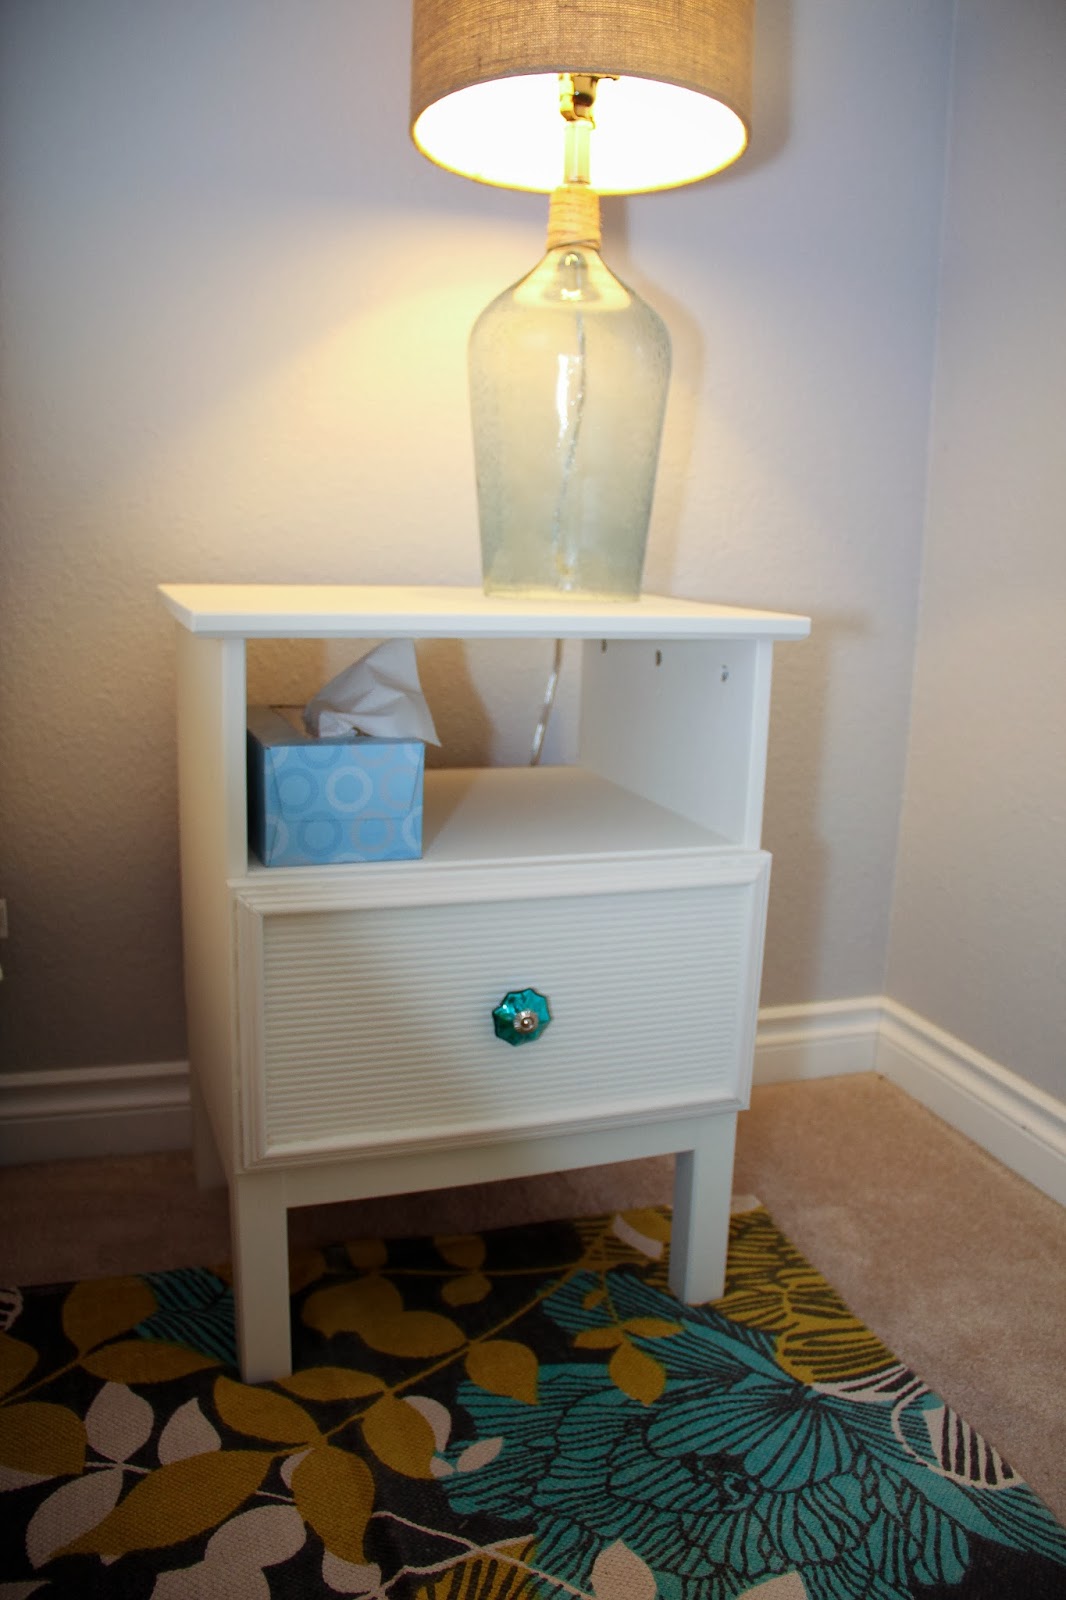
The finished product:
 And maybe in the future I'll change it up a bit, do something like this:

I just love the blue on the inside. Has anyone else had a similar uh-oh that turned out alright?
But decided against it after the white bed frame that I wanted wasn't in stock and had to get a black one instead. I just didn't want to have a black bed frame, white dresser and teal nightstand, it would look too crazy I think. So I decided to paint the nightstand white and then fancy it up. I thought grass cloth wallpaper would look cool but didn't want to spend so much to purchase an entire roll since I just needed a small amount. Then I decided to do nailhead trim. I love me some nailhead trim and had seen lots of DIY'd nailhead trim furniture.
But to save time, I read you can use a long strip of fake nailhead trim rather than hammering in each individual nail. Basically, it is a strip of fake nail head looking metal and every 5 or so is a hole that you would hammer in an actual nail.
Seemed easy enough. So I ordered it on amazon, got it a few days later and busted it out, applying it to the front of my drawer that I had already covered with paintable wallpaper and then painted. I wanted the nailhead trim to act as a frame or border around the wallpaper. After the first strip was applied I knew it wasn't going to look good but finished the entire border anyway. It looked awful. I didn't even take a picture of it, but the fake nailheads looked super cheap especially compared to the real nailheads. Also, the trim wouldn't stay in a straight line, and the real nails were impossible to hammer in all the way flush with the wood, so every 5 spaces there was an awkward looking real nail sticking up higher than the trim. Bad, just bad. I'm sure it works, as I've seen people's finished products online, and I'm sure it's easier to use on something that is upholstered. Or maybe it works if you have the patience to be meticulous. But I didn't because my little mister was screaming in the background. Anyway, after a few days of disgust, I decided to rip it off, repaint the front of the drawer and buy some wood moulding trim to frame out the drawer. I picked some that was thin enough so that it didn't overpower the drawer but thick enough to cover up the nail holes and scratches from the nailhead trim. So I cut the wood trim, glued it on (had an issue with that, too, you can read from my previous post...still need to caulk it), and repainted and all was (almost) well. So, there you have it. Hopefully I can spare you the trauma of using pre fab nailhead trim. But, something to take away from this is that you can try something and if it looks hideous or doesn't work, you can usually fix it and make it work. Yay for learning through mistakes.
The finished product:
I just love the blue on the inside. Has anyone else had a similar uh-oh that turned out alright?


Comments
Post a Comment